Welcome to BONNA BEAUTY, where beauty meets expertise! This detailed guide is designed to help students and skilled beauty professionals master the art of eyebrow waxing. Whether you’re just starting your training or looking to refine your skills, this comprehensive manual will walk you through every step of the process. We provide you with an in-depth, easy-to-follow tutorial. Let’s dive in!
Table of Contents
- Introduction to Eyebrow Waxing
- Pre-Waxing Preparation
- Eyebrow Mapping and Shaping Styles
- Supplies and Tools for Eyebrow Waxing
- Step-by-Step Waxing Process
- Post-Waxing Aftercare
- Common Mistakes and How to Avoid Them
- Advanced Tips for Professionals
- FAQs About Eyebrow Waxing
- Why Choose BONNA BEAUTY for Your Training?
1. Introduction to Eyebrow Waxing
Eyebrow waxing is a popular hair removal technique that offers precise, long-lasting results. It’s an essential skill for any beauty professional, as well-groomed eyebrows can dramatically enhance a client’s facial features. At BONNA BEAUTY, we believe that mastering this technique requires a combination of knowledge, practice, and attention to detail.
Benefits of Eyebrow Waxing
- Precision: Waxing allows for clean, defined lines and symmetrical shapes.
- Speed: Multiple hairs are removed at once, making it faster than tweezing.
- Long-Lasting Results: Waxing removes hair from the root, so regrowth is slower compared to shaving or trimming.
- Smoother Skin: Waxing exfoliates the skin, leaving it soft and smooth.
2. Pre-Waxing Preparation
Proper preparation is key to a successful waxing session. Here’s how to prepare your client and the workspace:
For the Client
- Consultation:
- Discuss the client’s desired brow shape. Use reference photos if needed.
- Assess their skin type and sensitivity. Perform a patch test if they have sensitive skin or are new to waxing.
- Pre-Wax Instructions:
- Advise the client to avoid sun exposure, retinoids, and exfoliation for 48 hours before the appointment.
- Ask them to arrive with clean, makeup-free skin.
For the Esthetician
- Sanitize Your Tools:
- Ensure all tools (tweezers, spatulas, etc.) are clean and sanitized.
- Use disposable spatulas to maintain hygiene.
- Set Up Your Workspace:
- Lay out all necessary supplies: wax, pre-wax oil, post-wax soothing gel, tweezers, and cotton pads.
- Ensure the wax heater is at the correct temperature (follow the manufacturer’s instructions).
3. Eyebrow Mapping and Shaping Styles
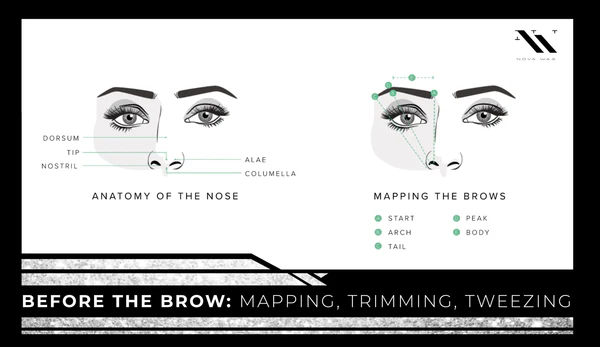
Eyebrow mapping is a crucial step in achieving symmetrical, well-proportioned brows. Here’s how to map and shape brows like a pro:
Eyebrow Mapping Technique
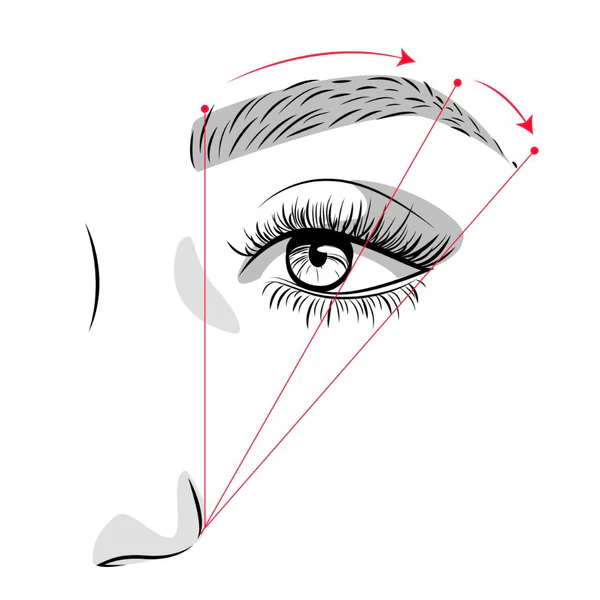
- Identify the Three Key Points:
- Start: Place a brow pencil vertically along the side of the nose. This is where the brow should begin.
- Arch: Angle the pencil from the side of the nose through the center of the iris. This is the highest point of the arch.
- End: Angle the pencil from the side of the nose to the outer corner of the eye. This is where the brow should end.
- Mark the Points:
- Use a white eyeliner or brow pencil to mark the start, arch, and end points on both brows.
- Connect the Dots:
- Draw a line connecting the points to create the desired shape.
Popular Eyebrow Shaping Styles
- Natural Brow:
- Follow the natural shape of the brow, removing only stray hairs for a soft, understated look.
- Soft Arch:
- Create a gentle arch that enhances the eyes without appearing too dramatic.
- High Arch:
- Ideal for clients who want a bold, lifted look. The arch is more pronounced and angled.
- Straight Brow:
- A trendy style that creates a youthful, relaxed appearance. The brow has minimal arch and follows a straighter line.
- Tailored Brow:
- Customize the shape based on the client’s facial features and preferences.
Eyebrow Waxing Styles
One of the best benefits of eyebrow waxing is how much a good eyebrow wax can enhance your features. In order to get the most out of your wax, understanding what style of eyebrow is most complementary is a game changer!
Heart-shaped faces: If your chin is the tip of the heart then your brows should be round to create a natural, soft, and feminine look that completes the shape of your face.
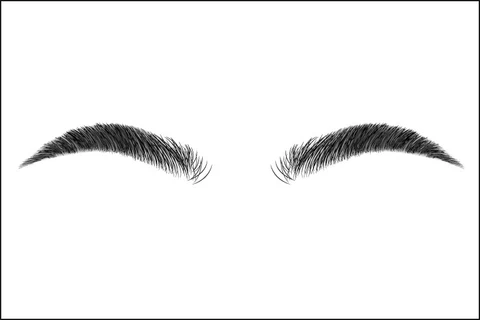
Oval-shaped faces: If your face tapers towards the chin, then angled eyebrows will soften your look but still help make your eyes be the center of attention.
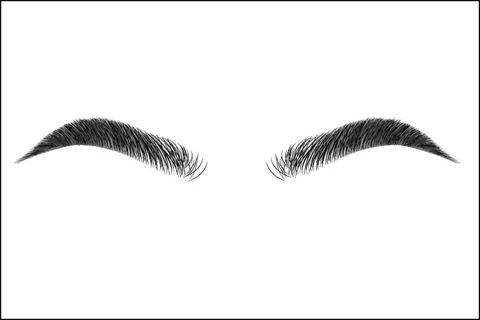
Round-shaped faces: If you have somewhat of a wide face then curved brows with a medium to high arch height will lengthen your face appearance.
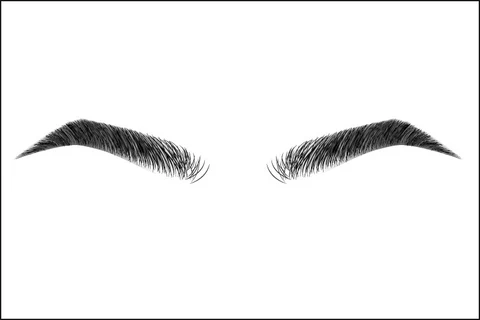
Square-shaped faces: If you have this type of face I suggest an angled eyebrow with a thick strong arch to create balance.
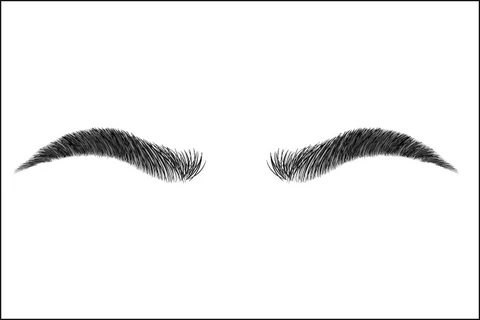
Long-shaped faces: If your forehead to chin is elongated than a horizontal flat brow line or straight brow line will accomplish the illusion of a shorter face.
4. Supplies and Tools for Eyebrow Waxing
Having the right tools and supplies is essential for a successful waxing session. Here’s what you’ll need:
Essential Supplies
- Wax:
- Hard Wax: Ideal for sensitive areas like the brows. It adheres to the hair, not the skin, reducing irritation.
- Soft Wax: Suitable for larger areas but can also be used for brows with proper technique.
- Wax Heater:
- A reliable heater to melt the wax to the correct temperature.
- Pre-Wax Oil:
- Protects the skin and reduces irritation during waxing.
- Post-Wax Soothing Gel:
- Calms the skin and reduces redness after waxing.
- Disposable Spatulas:
- For hygienic application of wax.
- Tweezers:
- High-quality tweezers for removing stray hairs and perfecting the shape.
- Cleanser:
- A gentle cleanser to prep the skin before waxing.
- Cotton Pads:
- For applying cleanser and soothing gel.
Optional Tools
- Brow Pencil or White Eyeliner: For mapping and shaping.
- Magnifying Lamp: To ensure precision during waxing.
- Aloe Vera Gel: For additional soothing post-wax.
5. Step-by-Step Waxing Process
Follow these steps to achieve flawless results:
Step 1: Cleanse the Brow Area
- Use a gentle cleanser or micellar water to remove any dirt, oil, or makeup.
- Pat the area dry with a clean towel.
Step 2: Apply Pre-Wax Oil (Optional)
- Apply a thin layer of pre-wax oil to protect the skin and reduce irritation. This step is especially helpful for sensitive skin.
Step 3: Mark the Brow Shape
- Use a brow pencil or white eyeliner to outline the desired shape. This serves as a guide during waxing.
- Follow the natural arch of the brow and ensure symmetry.
Step 4: Apply the Wax
- Dip a clean spatula into the wax and test the temperature on your wrist to ensure it’s not too hot.
- Apply a small amount of wax in the direction of hair growth. Work in small sections for precision.
Step 5: Remove the Wax
- Press a waxing strip over the wax and smooth it down firmly.
- Hold the skin taut with one hand and quickly remove the strip in the opposite direction of hair growth.
Step 6: Tweeze Stray Hairs
- Use tweezers to remove any hairs that the wax missed.
- Focus on creating clean, defined edges.
Step 7: Soothe the Skin
- Apply a post-wax soothing gel or aloe vera to calm the skin and reduce redness.
- Avoid using heavy creams or oils that could clog pores.
6. Post-Waxing Aftercare
Proper aftercare is essential to maintain smooth, healthy skin. Share these tips with your clients:
- Avoid Touching the Area:
- Keep hands away from the brows to prevent irritation or infection.
- Skip Makeup and Heavy Products:
- Avoid applying makeup, creams, or serums for at least 12 hours.
- Moisturize Gently:
- After 24 hours, use a lightweight, non-comedogenic moisturizer to keep the skin hydrated.
- Exfoliate Regularly:
- Exfoliate the brow area 2-3 times a week to prevent ingrown hairs.
- Schedule Regular Appointments:
- Recommend waxing every 4-6 weeks to maintain the shape and reduce regrowth.
7. Common Mistakes and How to Avoid Them
Mistake 1: Over-Waxing
- Solution: Always follow the natural shape of the brow. Avoid removing too much hair, as this can lead to uneven or sparse brows.
Mistake 2: Using the Wrong Wax Temperature
- Solution: Test the wax on your wrist before applying it to the client’s skin. Too hot can cause burns, while too cold won’t adhere properly.
Mistake 3: Skipping the Consultation
- Solution: Always consult with the client to understand their preferences and assess their skin type.
Mistake 4: Neglecting Aftercare
- Solution: Educate your clients on proper aftercare to ensure long-lasting results and prevent irritation.
8. Advanced Tips for Professionals
- Customize the Wax Formula:
- Use hard wax for sensitive areas and soft wax for larger sections.
- Master Brow Mapping:
- Learn the golden ratio of brow shaping to create balanced, symmetrical brows.
- Stay Updated on Trends:
- Keep up with the latest brow trends (e.g., feathered brows, laminated brows) to offer clients a variety of options.
- Practice Makes Perfect:
- Continuously practice your technique to improve speed and precision.
9. FAQs About Eyebrow Waxing
Q1: How Long Does Eyebrow Waxing Last?
- Results typically last 4-6 weeks, depending on the client’s hair growth cycle.
Q2: Can I Wax Over Retinoids or Accutane?
- No, these medications make the skin more sensitive. Wait at least 6 months after stopping Accutane before waxing.
Q3: What If the Client Has Sensitive Skin?
- Use a gentle wax formula and perform a patch test before the full treatment.
Q4: Can I Wax My Own Brows at Home?
- While possible, it’s best to leave it to professionals to avoid mistakes and ensure symmetry.
10. Why Choose BONNA BEAUTY for Your Training?
At BONNA BEAUTY, we’re committed to providing top-notch training for aspiring and experienced beauty professionals. Our courses cover everything from the basics to advanced techniques, ensuring you’re well-equipped to excel in the industry.
What We Offer:
- Hands-on training with expert instructors.
- Access to high-quality products and tools.
- Certification upon course completion.
- Ongoing support and resources to help you grow your career.
Final Thoughts
Eyebrow waxing is an art that requires skill, precision, and a deep understanding of your client’s needs. By following this guide and practicing regularly, you’ll be able to deliver flawless results that leave your clients feeling confident and beautiful.
Ready to take your skills to the next level? Join BONNA BEAUTY’s training program today and become a master of eyebrow waxing!

